
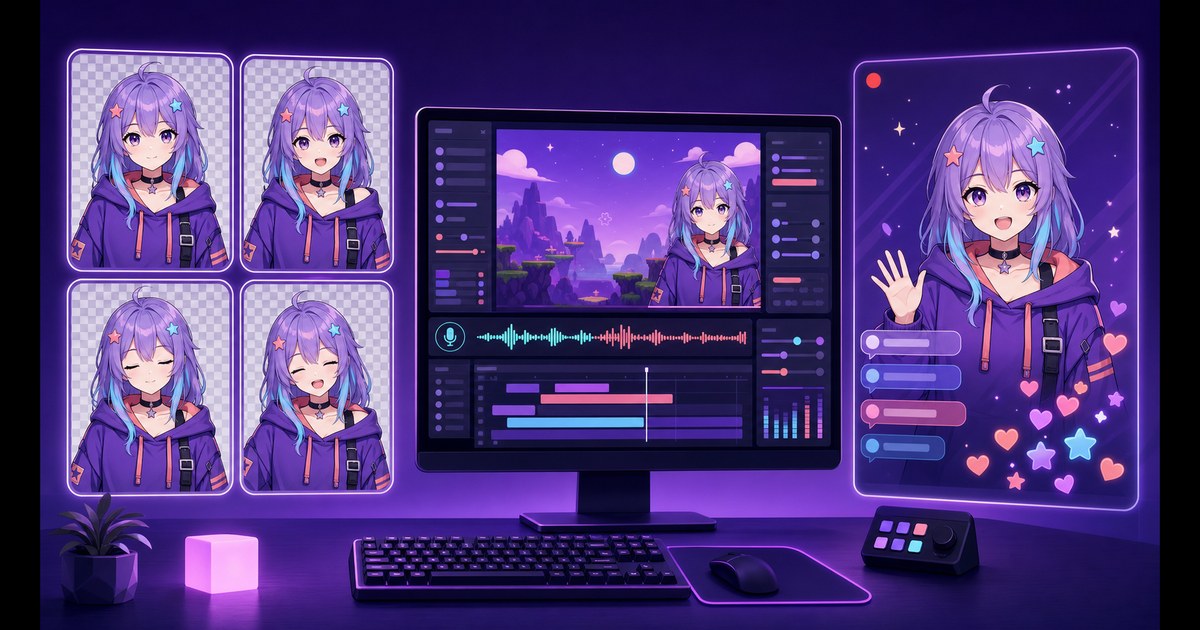
You can become a PNGTuber on Twitch without a webcam, face tracking or a rigged 3D model. The basic workflow uses a set of transparent character images, a reactive avatar program that listens to your microphone, and broadcasting software that sends the finished scene to Twitch.
This guide takes you through the complete setup: making the character, choosing PNGTuber software, adding the avatar to OBS, connecting OBS to Twitch and checking the stream before you go live.
How to stream as a PNGTuber on Twitch
- Create matching idle, speaking and blinking character images.
- Open them in Veadotube Mini or another compatible PNGTuber program.
- Select your microphone and tune the speaking threshold.
- Capture the reactive avatar in OBS with transparency or a colour key.
- Build a Twitch scene with the avatar, game or presentation source, alerts and audio.
- Connect OBS to your Twitch account and choose stable broadcast settings.
- Make a local recording and review it before starting the live broadcast.
Live stream or recorded PNGTuber video?
The same voice-reactive avatar and OBS scene can be used for a live broadcast or a local recording. For a YouTube video, record the finished OBS scene locally and edit that file before upload instead of connecting OBS to a live service.
Standard YouTube videos normally suit a horizontal scene. Shorts and TikTok videos usually need a separate vertical canvas with the avatar, captions and gameplay repositioned for the narrow frame. Save a dedicated OBS profile or scene collection rather than stretching the horizontal Twitch layout.
If you need the images first, open the Free PNGTuber Maker. It generates four consistent transparent states and a downloadable Veadotube Mini project from one character description.
1. Create four PNGTuber states
A simple Twitch PNGTuber normally uses four images:
- Idle: eyes open and mouth closed.
- Speaking: eyes open and mouth open.
- Blinking: eyes closed and mouth closed.
- Blinking while speaking: eyes closed and mouth open.
Every image should use the same canvas size, crop, body position and silhouette. Hair, shoulders, clothing and accessories should remain fixed while only the intended facial state changes. Otherwise the character will jump whenever the microphone activates.
Make the character for free
In the online PNGTuber creator, describe the character, select a visual style, choose the framing, and optionally write a free-form pose and emotion direction. You can try three creations before an account is required.
Design for the size the avatar will occupy on stream. A clear silhouette, readable face and limited tiny costume details usually survive downscaling better than a very intricate full-body design.
2. Choose PNGTuber software
The image maker creates the character assets, but it does not replace the runtime program that reacts to your voice.
Veadotube Mini is the simpler choice for complete image states and currently supports Windows, Linux and macOS. PNGTuber Plus is a free Windows option for characters separated into layers that can use bounce, jiggle and secondary movement.
The four complete images produced by FreePNGTuber fit the Veadotube-style workflow directly. If you want layered physics instead, you must prepare the character as separate parts. Read the PNGTuber software comparison before committing to one format.
3. Configure the microphone reaction
Open the character project in the reactive avatar program and select the microphone you actually use for the Twitch stream. Speak at your normal distance and volume while watching the input level.
Set the speaking threshold above room noise but below your regular voice level. Test silence, normal speech, quiet speech and keyboard noise. The mouth should remain closed while silent, open promptly while talking, and not trigger constantly from fans or typing.
Let the avatar run for a minute to verify blinking. If the character shifts between states, correct the source images before building the full Twitch scene. The Veadotube Mini setup guide covers microphone and state troubleshooting in more detail.
4. Add the PNGTuber to OBS
Open the reactive avatar program before OBS. Add it to the intended scene using the best capture method supported by your operating system:
- Windows: Spout2 Capture or Game Capture with transparency; Window Capture with a colour key as a fallback.
- Linux: PipeWire video on a compatible system; Window Capture and a colour key as a fallback.
- macOS: Syphon Client when available; macOS Screen Capture and a colour key as a fallback.
Our complete PNGTuber and OBS guide explains each capture method, background removal, transparency, cropping and common blank-source problems.
5. Build a readable Twitch scene
Place the PNGTuber where it does not cover game controls, subtitles, minimaps, captions or important browser content. Resize from a corner to preserve the image proportions.
A useful starter scene contains:
- the game, screen or presentation source;
- the reactive PNGTuber source;
- your microphone audio source;
- optional alerts and chat elements;
- a simple background when no game is visible.
The avatar program uses the microphone to animate the mouth, but that does not automatically send microphone audio to viewers. Check the OBS audio mixer separately. If the character moves but the recording is silent, repair the OBS audio device rather than the PNGTuber threshold.
6. Connect OBS to Twitch
Use OBS settings to connect the service to Twitch through the current account connection or stream-key method offered by the applications. Never show a stream key in screenshots, recorded tutorials or support messages. If one is exposed, replace it through Twitch rather than continuing to use it.
Twitch recommends choosing settings that balance visual quality with playback stability. Its official Broadcasting Guidelines specifically note that a stable stream is better than pushing resolution or bitrate beyond the computer and connection.
The current Twitch guidance recommends CBR and explains that higher resolution and frame rate require more bitrate and encoding power. Do not copy the highest specification automatically. Use settings your upload connection and encoder can sustain without dropped frames.
7. Test before going live
Record at least one minute locally in OBS before the first broadcast. Talk normally, stay silent, type, move between scenes and trigger any alerts you plan to use.
Review the recording at normal viewing size and check:
- the mouth reacts without remaining permanently open;
- blinking does not shift the body;
- the avatar is sharp and large enough to read;
- the microphone is audible and not clipping;
- game or desktop audio is balanced with the voice;
- the avatar does not cover important content;
- no private browser-source URL or stream key appears.
After the local test passes, review Twitch’s official Creator Camp for current guidance on going live, channel setup, branding, community and platform policies.
Once the character and scene are stable, use the PNGTuber Twitch banner maker guide to create matching 1920×600 profile artwork. The banner add-on becomes available after the character is complete; it is separate from the live overlay and should be previewed against the current responsive channel layout.
Common Twitch PNGTuber problems
The PNGTuber moves but viewers cannot hear me
The reactive program and OBS audio are separate. Add or correct the microphone in OBS and confirm that its mixer meter moves while you speak.
The mouth opens from keyboard noise
Move the microphone closer to your voice, reduce gain when appropriate, and raise the avatar program’s speaking threshold until normal room noise no longer triggers it.
The avatar has a coloured box around it
Use a transparent capture method or apply an OBS colour-key filter to a solid background that does not appear in the character design.
The PNGTuber is blurry
Start with sufficiently large transparent images, avoid enlarging a tiny captured window, and check the avatar at the actual broadcast resolution.
The stream drops frames
Prioritize stability. Lower settings that exceed the available upload connection or encoder performance, then retest. Follow the current Twitch broadcasting guidance rather than assuming the maximum published setting fits every computer.
Start with the character
You do not need a webcam or a rigged model to start a PNGTuber Twitch channel. Build a readable four-state character, make the microphone reaction reliable, and only then add overlays and advanced production elements.