
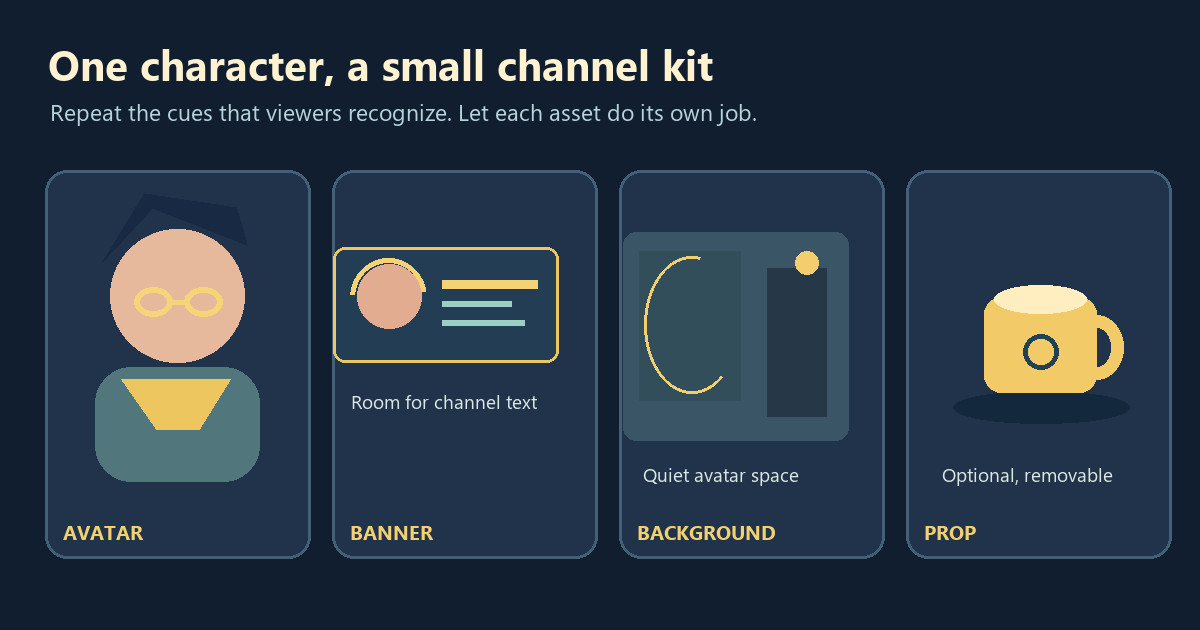
A matching channel kit does not need a logo or a dozen custom assets. Start with the character viewers will actually watch, then carry a few recognizable choices into the places they will see before and during a stream. The useful question is whether someone who opens your profile and then joins your stream can tell it belongs to the same creator.
This is a planning guide for a small PNGTuber channel kit: avatar, profile banner, stream background and one or two props. It does not replace the separate guides to making a Twitch banner or placing a background behind a PNGTuber. Here, the job is deciding what should stay consistent across them.
Write down the character’s identity anchors
Put your idle PNG beside the speaking PNG at the size it will occupy in a real stream. List what still reads: perhaps a swept fringe, a mustard-yellow scarf, and a square hair clip. Those are identity anchors. Tiny embroidery that vanishes in the preview is not. If the talking and quiet states already disagree about hair or clothing, repair that before borrowing either image as a reference for more art.
Make a short handoff note: character name or description; two or three colors; one recognizable shape; line style; and the feeling of the show. For example, “round glasses, ink-blue hair, warm paper-yellow accent, softly outlined; calm late-night drawing stream” is easier to apply than “make everything match.” Keep the note beside your source files so you do not need to reconstruct it at every update.
Do not force every asset to show the whole character. A banner can repeat the glasses shape and yellow accent even if the avatar appears only as a small figure. A background may use the same warmth without putting a huge portrait behind your live avatar. Recognition comes from selective repetition, not cloning the avatar across every surface.
Give each asset a different job
The avatar carries expression and speech. Its mouth and eyes need to remain legible at actual stream size. The profile banner introduces the channel outside the live video. A stream background gives the avatar a place to sit without swallowing its silhouette. A transparent prop is optional; it can mark a recurring segment, such as a drawing mug or a little desk lamp. If an item has no clear use in the show, leave it out for now.
Twitch’s Creator Camp branding guidance recommends consistency across Twitch and social media and warns against building an identity around somebody else’s intellectual property. That is a reason to keep your own stable visual cues, not a reason to manufacture a complicated brand manual before your first broadcast.
Profile art and stream art also appear in different layouts. The banner is not an OBS overlay. The background is not a substitute for a readable avatar. Give each file a clear name and intended destination instead of relying on one wide image to work everywhere.
Choose a palette that survives the actual scene
Pick one base color and a restrained accent. Add a light and a dark neutral for separation. Rather than copying exact hex values into every object, decide where each color earns its place: the avatar’s scarf, a banner detail, a lamp in the room. Let the rest of the environment support the character. An all-yellow room behind a yellow scarf will make the scarf disappear.
Test the assembled scene in grayscale, then against the backgrounds you plan to show. Place the avatar over a dark gameplay frame, a bright menu, and your waiting screen. If dark hair disappears against the room, lighten the area immediately behind the head or add a restrained edge to the source art. If bright props compete with the face, move or dim the props. The small preview matters more than how attractive each file looks alone.
Typography is separate from the palette. If you need an exact channel name or schedule on the banner, check every letter after export. Do not rely on an image generator to spell it for you. Keep important wording editable when your streaming time changes.
Build the minimum kit in a useful order
- Finish the avatar. Check quiet, talking and blink states together. The PNGTuber Maker is useful if you still need the reactive character; keep its finished states as the visual reference for the rest of the kit.
- Make a profile banner. Use the approved identity anchors, then preview the result on the channel page at more than one browser width. FreePNGTuber’s standalone banner maker lets you choose the visual direction, palette, composition and output size, with exact text added separately from the generated art. Do not assume any preset stays fully visible in every layout.
- Add a background only where needed. For chatting or waiting scenes, reserve an uncluttered patch behind the avatar. The standalone background maker lets you choose the open avatar side. If gameplay fills the frame, a full illustrated room may be unnecessary.
- Add a prop if it earns its space. One consistent mug or mascot is more useful than many unrelated decorations. Keep transparent props as separate sources so you can hide them when they block the face or game HUD. The VTuber assets maker produces coordinated transparent prop variations, but you do not need a prop pack to launch.
These are separate creator tools with a shared creation allowance; do not mistake an older post-completion matching-banner workflow for a prerequisite of the current standalone banner and background makers. Check each tool’s live controls before spending a creation.
Check the kit as a viewer would
Open the channel profile in a narrow browser window, then in a wide one. Is the character or key motif still recognizable in the banner? Next, assemble a representative OBS scene and watch its output-sized preview. A banner can look excellent on a profile while the matching room makes the live avatar almost invisible. Treat those as different tests.
Switch between the quiet and talking states over the real background. Check the mouth against light and dark patches, and look for sudden shifts in outfit color between states. Move a prop into its planned position and make sure it does not conceal the face, captions or important game information. If you change a palette color after this check, repeat the scene test rather than assuming the files still work together.
Keep the original character files and a short asset inventory with their intended use: avatar states, profile banner, stream room and optional props. Export a fresh file for a changed placement rather than overwriting the only approved version. The result can be modest. A kit that remains readable and clearly yours is better than a pile of perfectly color-matched art that fights the stream.